
If you’re like me, you want snacks that are tasty, healthy, and super easy to make. One hot summer day, I wanted something cold but didn’t want soda or ice cream.
That’s when I thought of making fruit popsicles at home. Trust me, once you try this recipe, you’ll never buy store popsicles again.
They’re fresh, colorful, and your kids will love them. Let me walk you through it.
Why Homemade Fruit Popsicles Are the Best
When you buy popsicles from the store, they often come with too much sugar, artificial colors, and ingredients you can’t even pronounce.
But when you make them at home, you know exactly what goes inside. Just fresh fruit, maybe a little honey, and that’s it. Plus, you can mix flavors the way you like.
What You’ll Need
The best part? You don’t need anything fancy. Just a few simple things:
- Fresh fruit (mango, strawberries, watermelon, kiwi, blueberries – anything you love)
- A blender or food processor
- Honey or maple syrup (optional, if your fruit isn’t sweet enough)
- Popsicle molds (or even small cups with sticks)
That’s all. No big shopping list.
Step-by-Step Recipe
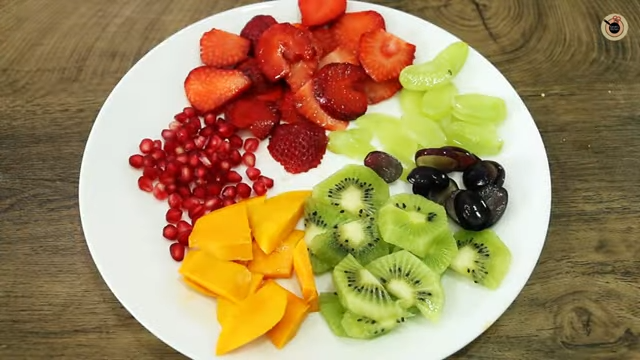
Step 1: Choose Your Fruit
Pick ripe, juicy fruits. If you mix colors, the popsicles look even more fun. For example, mango + strawberry = a tropical vibe.
Step 2: Blend It Up
Cut your fruit into small pieces and blend until smooth. If you like chunks, don’t blend too much. Sometimes I leave small pieces of fruit so every bite has a surprise.
Step 3: Sweeten (If Needed)
Taste your mix. If it’s already sweet, no need for sugar. But if you want extra sweetness, add a little honey or maple syrup. Keep it natural.
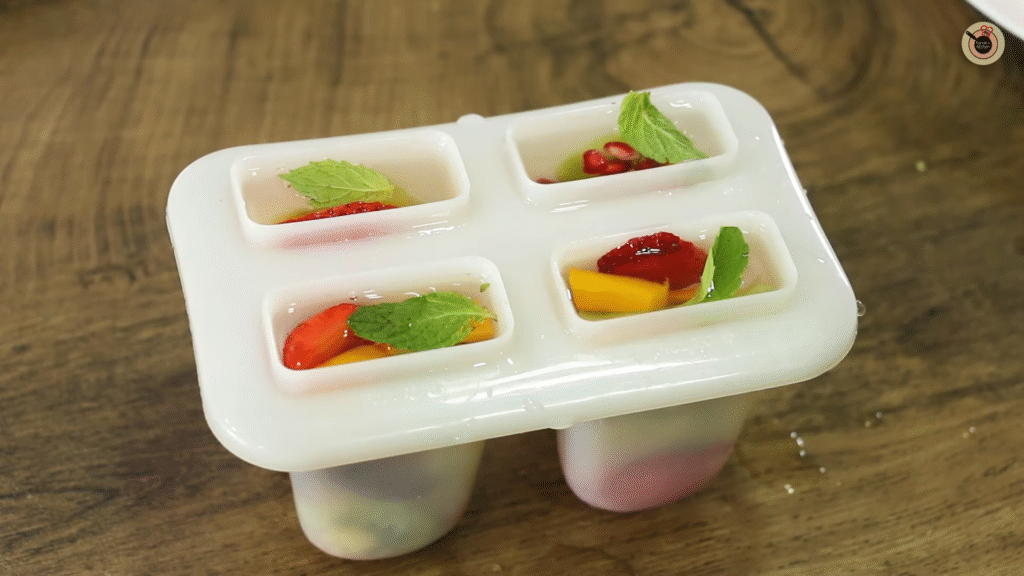
Step 4: Pour Into Molds
Fill your popsicle molds or cups. Add sticks in the middle.
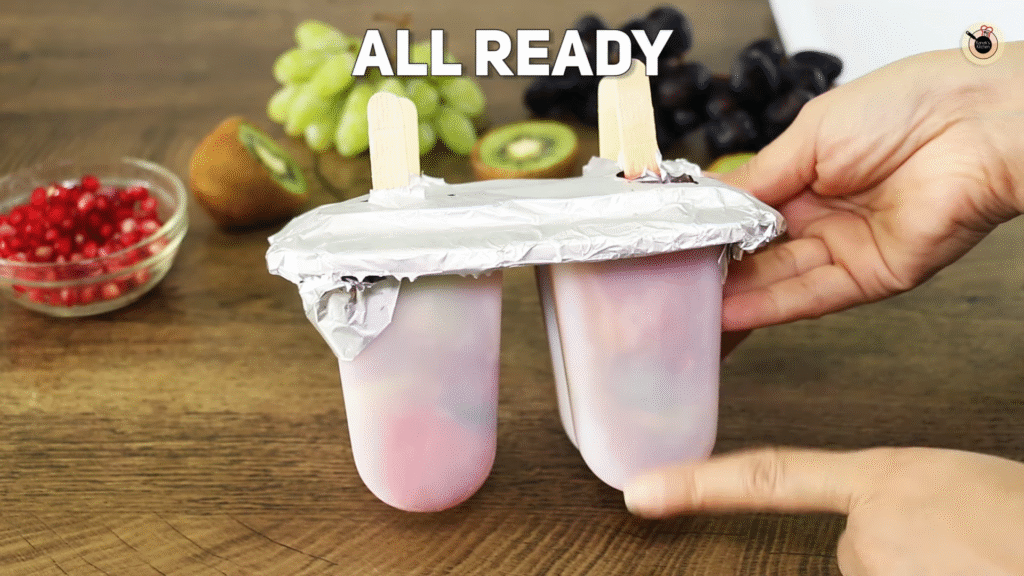
Step 5: Freeze
Put them in the freezer for 6–8 hours. The hardest part is waiting!
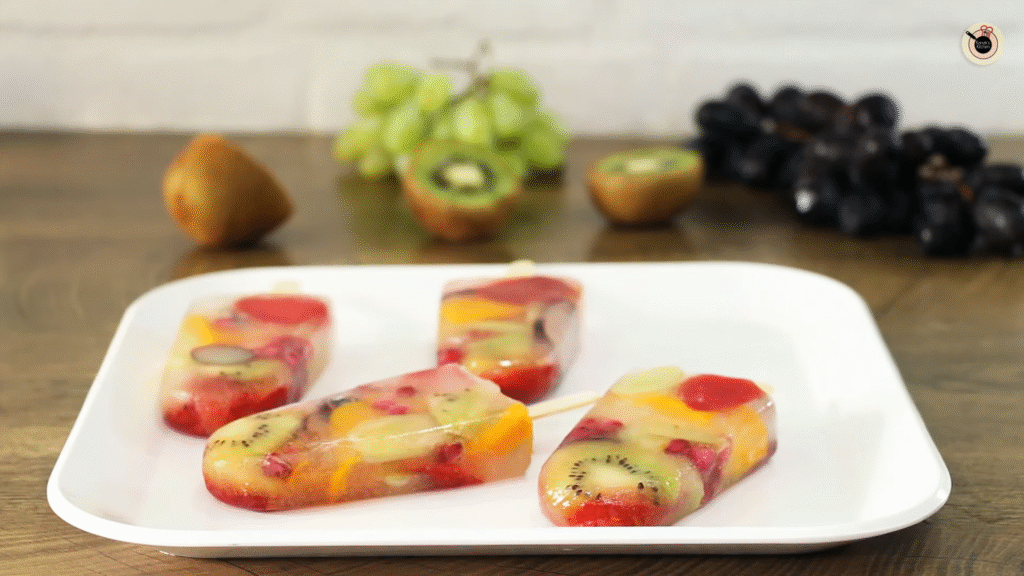
Step 6: Enjoy
Take them out, run a little warm water on the outside of the mold, and your popsicle will slide out easily. Now enjoy the cool, fresh taste.
Fun Flavor Ideas
Here are some combos I tried, and they turned out amazing:
- Strawberry + Banana – Classic and creamy.
- Mango + Pineapple – Tropical sunshine in your mouth.
- Blueberry + Yogurt – A little creamy and very refreshing.
- Watermelon + Mint – So cool, you’ll want two.
You can even layer fruits. Pour one fruit blend, freeze for 30 minutes, then add another. You’ll get colorful striped popsicles that kids love.
Why Kids Love Them (And Parents Too)
Kids love them because they look like rainbow ice sticks and taste sweet. Parents love them because they’re made of 100% real fruit.
No junk, no guilt. It’s a win-win. Plus, making them together can be a fun little family activity.
Tips to Make Them Perfect Every Time
- Always use ripe fruit – more flavor and natural sweetness.
- If you don’t have popsicle molds, small paper cups with wooden sticks work fine.
- Want them creamier? Add a little yogurt or coconut milk.
- To avoid ice crystals, blend well and freeze quickly.
FAQs
Q1: Can I make these popsicles without a blender?
Yes! Just mash soft fruits like banana or kiwi with a fork and mix. It won’t be super smooth, but it works.
Q2: How long do homemade popsicles last in the freezer?
They stay good for about 2–3 weeks if sealed well.
Q3: Can I add vegetables too?
Of course! Spinach with mango works well, and kids won’t even notice the veggies.
Q4: Do I need to add sugar?
No, if your fruit is sweet enough, skip it. But a little honey or maple syrup is fine if needed.
Q5: What if I don’t have popsicle sticks?
Use plastic spoons, skewers, or even leave them without sticks and eat with a spoon.
There you go – a simple, healthy, and fun recipe you can make today. Next time your kids ask for ice cream, hand them one of these homemade fruit popsicles. They’ll smile, and you’ll feel good knowing it’s healthy.
👉 Do you want me to also create a printable recipe card version of this so you can keep it handy in your kitchen?